Manage Storage Pool
Managing Storage Pools
Once a storage pool is selected in the FlexSDS Web Management Platform, the interface displays the following tab panels:
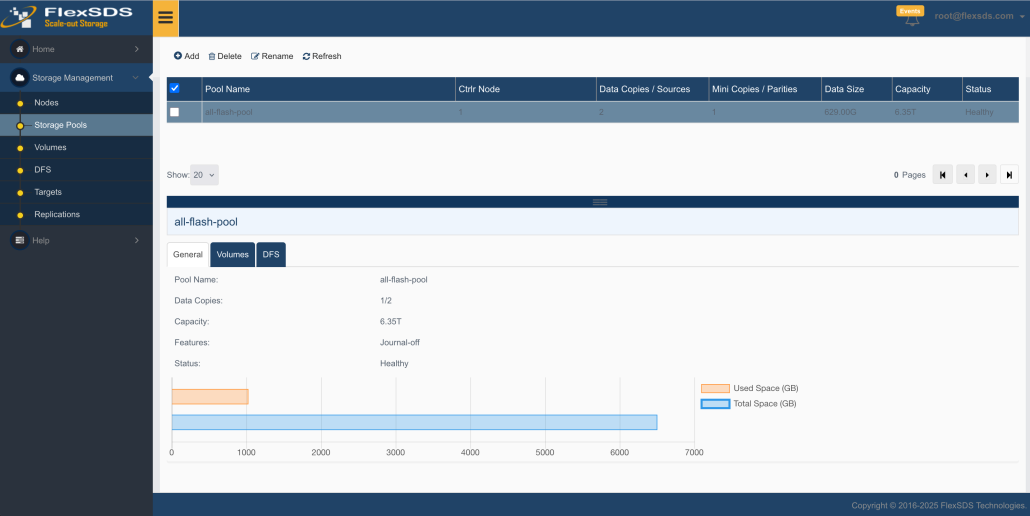
- General
Displays basic information about the storage pool, such as name, redundancy settings (copies), capacity, and utilization. A visual bar chart illustrates both used and total space. - Volumes
Lists all logical volumes associated with the storage pool. Users can manage volume operations here. - DFS
Lists all Distributed File Systems (DFS) created within the storage pool. DFS management is accessible from this tab.
Manage Volume

Add Volume
Click the Add link to open the Create Volume Wizard.

Specify the following parameters:
Volume Name
Size
Quota (maximum space including user data and metadata)
Format
Note: For RAW volumes, Quota equals Size. For Thin or Log-Structured volumes, additional space is required for metadata and snapshots, so the quota must be larger than the data size.
Click Next to proceed.
.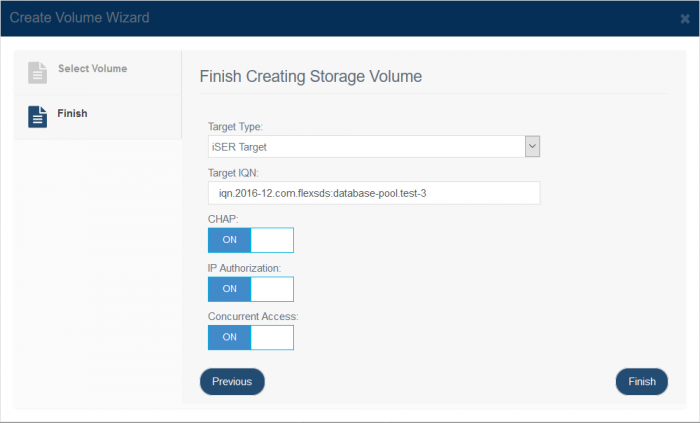
Attach a network target:
Select Target Type (iSCSI, iSER, or NVMe-oF)
Specify the Target IQN
Click Finish to complete volume creation.
Expand Volume
Click the “<->” icon to increase volume capacity.
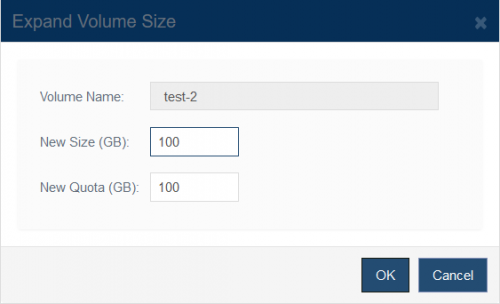
Specify the new Size or Quota, then click OK to confirm.
Remove Volume
Click the “X” icon next to the volume entry. Confirm the deletion to permanently remove the volume.
Managing Distributed File Systems (DFS)
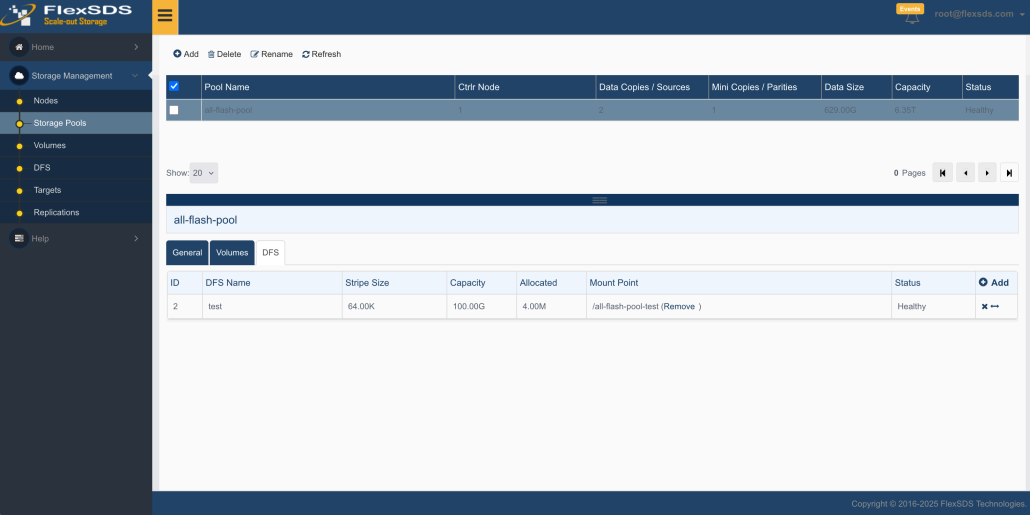
Add DFS
Click the Add link to launch the Create DFS Wizard.
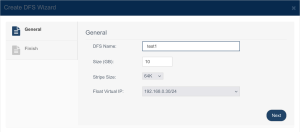
Specify the following parameters:
DFS Name
Size
Stripe Size (default is 64K)
Note: Larger stripe sizes improve performance for large block I/O but may reduce performance for small block I/O.
Click Next to proceed.
Attach an NFSv3 network target:
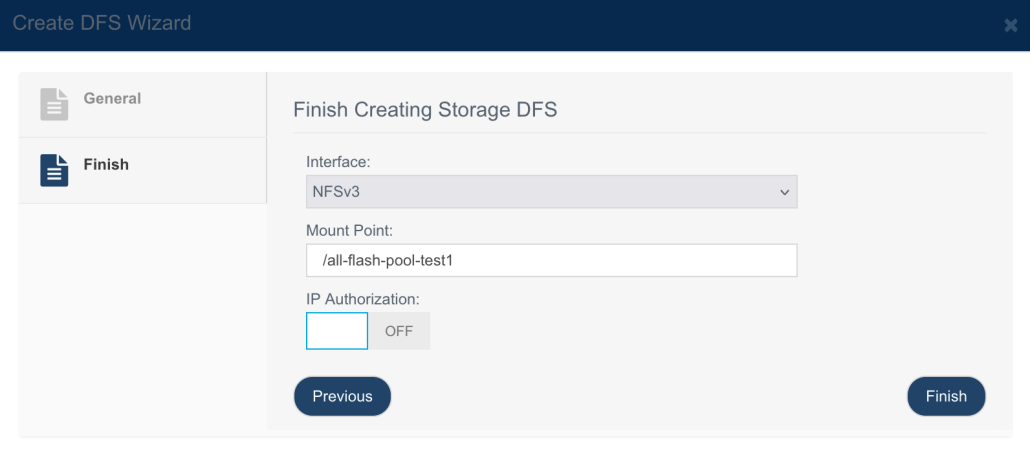
Select Interface
Specify the Mount Path
Click Finish to complete DFS creation.
Expand DFS
Click the “<->” icon next to a DFS to increase its size.
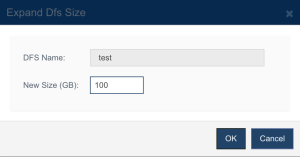
Enter the new size and click OK to apply.
Remove DFS
Click the “X” icon next to the DFS entry. Confirm the deletion to permanently remove the DFS.
Manage Storage Pool
Use can do the following management to a existing storage pool:
1. Rename Click the Edit link on the top toolbar, the Edit Storage Pool dialog shows.
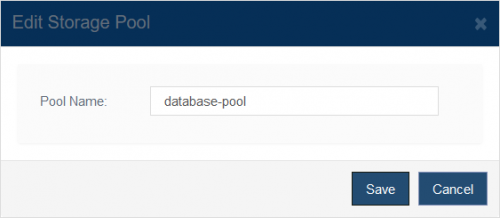
Type new storage pool name then press the Save button to rename it.
2. Remove
Click the Remove link on the task panel, the confirm box shows.

Click the OK button to remove the storage pool, please note this is very dangerous operation, all data in the storage pool will be destroyed, and storage pools are heavy component of the system, we do not recommend user to frequently create and remove storage pools.